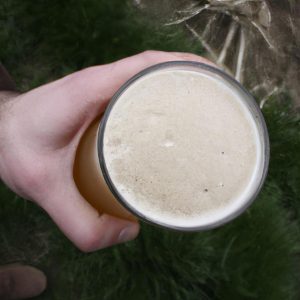
Bottling Techniques: Beer Reviews Homebrewing Tips
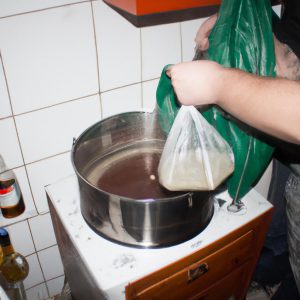
Bottling techniques play a crucial role in the production of high-quality beers. The process involves transferring beer from fermentation vessels into bottles, ensuring proper carbonation and preserving flavor profiles. Homebrewing enthusiasts often encounter challenges when it comes to bottling their creations effectively. To illustrate this point, let us consider the case of John, an avid homebrewer who meticulously crafted a batch of pale ale but was disappointed with the inconsistent carbonation levels across his bottled beers. This article aims to provide comprehensive insights into bottling techniques by offering beer reviews and homebrewing tips that will empower both novice and experienced brewers alike.
The art of effective bottle conditioning requires careful attention to detail. Carbonation is achieved through secondary fermentation, where residual yeast consumes sugars added during bottling, producing carbon dioxide as a byproduct. However, improper handling or inadequate priming sugar can result in undercarbonated or overcarbonated brews. Additionally, factors such as temperature fluctuations and contamination introduce further complexities to the process. By exploring various bottling methods and troubleshooting common issues like inconsistent carbonation, off-flavors, and sediment accumulation, this article aims to equip readers with practical knowledge that enhances their ability to produce consistently excellent homebrewed beers. Through reviewing different beer styles and highlighting the characteristics that make each one unique, readers will gain a deeper understanding of flavor profiles and be able to tailor their brewing techniques accordingly.
In addition to discussing bottle conditioning, this article will also delve into alternative bottling methods such as kegging and canning. Kegging offers several advantages over traditional bottling, including faster carbonation and greater control over serving pressure. Canning, on the other hand, provides superior oxygen barrier properties and is becoming increasingly popular among craft brewers due to its convenience and portability.
To ensure a successful bottling experience, proper sanitation practices cannot be emphasized enough. Contamination can lead to off-flavors or even ruined batches of beer. This article will provide detailed instructions on how to properly clean and sanitize bottles, as well as tips for preventing oxidation during the bottling process.
Whether you are a beginner looking to learn the basics of bottling or an experienced brewer seeking advanced techniques, this article aims to cater to all levels of expertise. By offering comprehensive information on various aspects of bottling, troubleshooting common issues, and providing practical tips from industry professionals, readers will have the tools they need to improve their homebrewing skills and produce consistently high-quality beers.
So join us on this journey through the world of bottling techniques and elevate your homebrewing game to new heights! Cheers!
Choosing the Right Bottles for Homebrewing
Imagine this scenario: you have just finished brewing your own batch of beer, carefully selecting the finest ingredients and meticulously following the recipe. Now comes the crucial step of bottling your creation to ensure that it matures into a flavorful and enjoyable beverage. But with so many types of bottles available in the market, which one should you choose? In this section, we will explore different factors to consider when selecting bottles for homebrewing.
Firstly, it is important to understand that not all bottles are created equal. The choice between glass and plastic bottles can greatly impact the quality and taste of your beer. Glass bottles provide better oxygen barrier properties, preventing oxidation and maintaining freshness over time. On the other hand, plastic bottles offer convenience due to their lightweight nature but may not be as effective in preserving flavors. Consider weighing these pros and cons before making your decision.
Secondly, bottle size plays a significant role in determining the overall experience of consuming your homebrewed beer. Smaller bottle sizes such as 330ml or 355ml allow for easy serving and help control portion sizes during tastings or social gatherings. Larger bottle sizes like 500ml or 650ml are suitable if you prefer sharing your brews with others or aging them for longer periods. Additionally, keep in mind that certain styles of beer are traditionally served in specific bottle sizes to enhance their presentation.
To further aid in your decision-making process, here is a bullet point list summarizing key considerations:
- Choose glass bottles for superior oxygen barrier properties.
- Opt for plastic bottles if convenience is a top priority.
- Select smaller bottle sizes for individual servings or larger ones for sharing.
- Take into account traditional preferences associated with certain beer styles.
Now let’s delve into the importance of sanitizing and cleaning bottles properly – a critical step towards ensuring successful fermentation and avoiding contamination issues throughout your entire homebrewing journey.
Sanitizing and Cleaning Bottles Properly
Imagine this scenario: You have just finished brewing a delicious batch of beer at home. The fermentation process went smoothly, and now it’s time to bottle your creation. But before you start popping caps on those bottles, it’s important to understand the proper storage techniques for bottled beer. Ensuring that your beer is stored correctly will help maintain its quality and taste over time.
One key aspect of storing bottled beer is choosing the right location. Ideally, you want to find a place that is cool, dark, and free from temperature fluctuations. A basement or a dedicated beer cellar would be perfect if available. Exposure to light can lead to the breakdown of hop compounds in the beer, resulting in off-flavors and aromas. Additionally, extreme temperatures can cause unwanted reactions within the bottle, affecting carbonation levels and overall flavor.
Next, let’s discuss some essential tips for properly storing your bottled beer:
- Keep the bottles upright: While wine may benefit from being stored on its side, keeping beer bottles upright helps prevent any potential oxidation caused by contact between the liquid and cap.
- Maintain consistent temperatures: Fluctuating temperatures can negatively impact the quality of your brews. Aim for a stable temperature range between 50°F (10°C) and 55°F (13°C).
- Avoid excessive vibrations: Vibrations can disturb sediment within the bottle, leading to cloudy beers with an unpleasant texture.
- Monitor humidity levels: High humidity can promote mold growth on labels or even affect cork integrity if using corked bottles.
To further illustrate these points visually, here is a table showcasing ideal storage conditions for different types of beer:
| Type of Beer | Temperature Range (°F) | Ideal Serving Temperature (°F) |
|---|---|---|
| Lager | 38-45 | 40 |
| Ale | 50-55 | 50 |
| Stout | 55-60 | 55 |
| Sour | 45-50 | 48 |
Understanding the importance of proper storage techniques is essential for any homebrewer. By following these guidelines, you can ensure that your hard work and dedication result in beers that maintain their quality over time.
Next, we will delve into the fascinating world of carbonation methods to add a sparkling touch to your bottled beer creations.
Understanding Carbonation Methods
Transitioning from the previous section on sanitizing and cleaning bottles properly, let us now delve into understanding carbonation methods in homebrewing. To illustrate this, let’s consider a hypothetical scenario where a homebrewer named Alex wants to achieve perfect carbonation levels in their beer for optimum flavor and mouthfeel.
There are several carbonation methods available to homebrewers, each with its own advantages and considerations. One common method is natural carbonation, where priming sugar is added during bottling to allow the yeast to consume it and produce carbon dioxide naturally. This method requires careful measurement of the amount of priming sugar used, as too little may result in undercarbonated beer while too much can lead to overcarbonation or even bottle explosions.
Another option is forced carbonation, which involves using a CO2 tank and regulator to carbonate the beer quickly. While this method offers more control over the carbonation process, it requires additional equipment and can be more expensive than natural carbonation. Additionally, proper adjustment of pressure settings and monitoring of temperature is crucial to avoid overcarbonating or undercarbonating the beer.
To help you further understand these different carbonation methods, here are some key points:
-
Natural Carbonation:
- Requires adding priming sugar at bottling time.
- Allows flavors to develop over time during conditioning.
- Can be inconsistent due to variations in yeast activity.
- Requires longer conditioning periods before consumption.
-
Forced Carbonation:
- Involves using a CO2 tank and regulator.
- Provides precise control over carbonation levels.
- Enables quicker turnaround times for enjoying your brews.
- Initial setup costs can be higher compared to natural carbonation.
By considering these factors when choosing a carbonation method, homebrewers like Alex can ensure that their beers have just the right level of effervescence. The next section will focus on another critical aspect of bottling: filling bottles with precision, ensuring a professional and consistent end product.
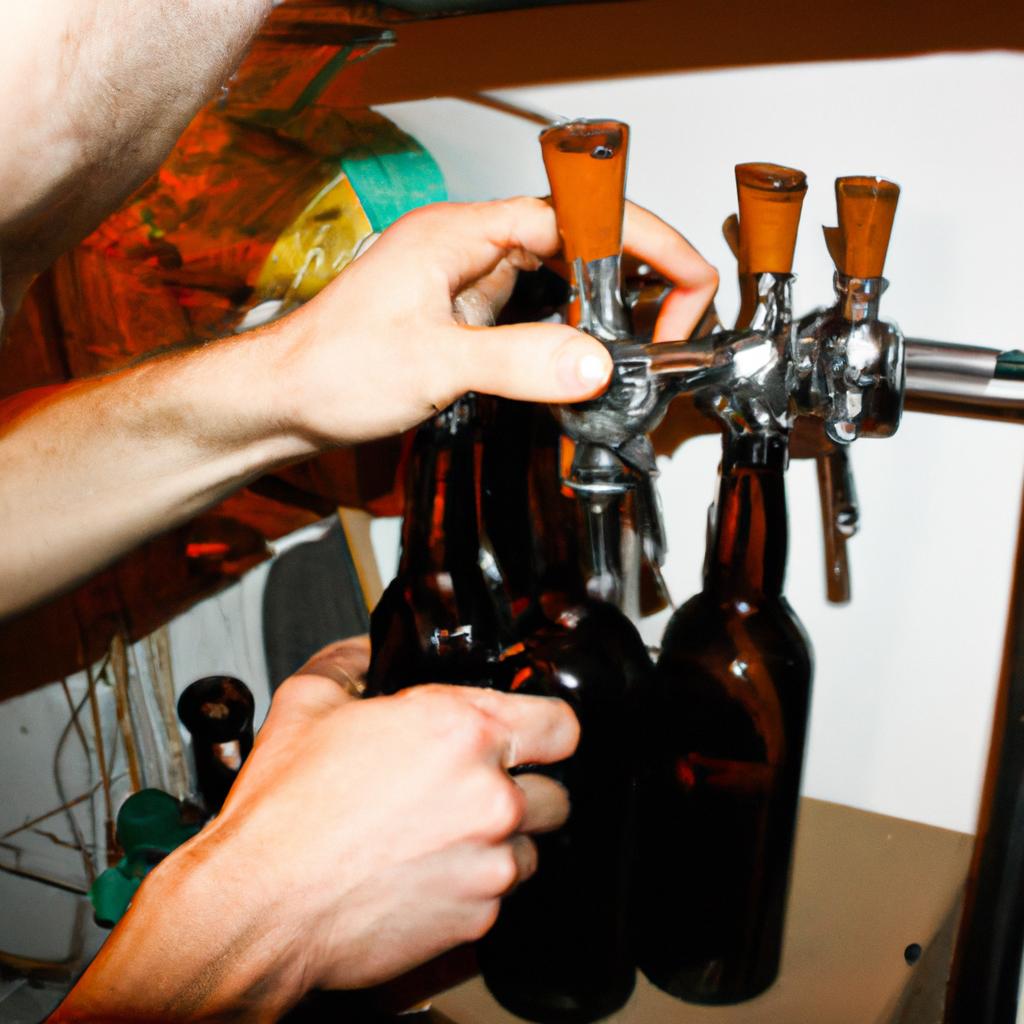
Filling Bottles with Precision
In the previous section, we explored the various carbonation methods used in bottling beer. Now, let’s delve deeper into how to fill bottles with precision, ensuring consistent carbonation levels and a satisfying drinking experience.
Imagine this scenario: You’ve spent weeks perfecting your homebrew recipe, carefully selecting ingredients and meticulously monitoring fermentation temperatures. It’s finally time to bottle your creation. But if you don’t fill those bottles accurately, all your hard work could be wasted. To prevent disappointment, follow these tips for precise bottle filling:
-
Maintain a steady flow: When transferring beer from the fermenter to the bottling bucket or directly into individual bottles using a siphon or bottling wand, ensure a consistent flow rate. This will help avoid excessive foaming and inconsistent carbonation levels.
-
Leave headspace: As you fill each bottle, leave some room at the top (about ½ inch) to accommodate natural carbonation without causing excessive pressure buildup that can lead to exploding bottles.
-
Avoid oxygen exposure: Oxygen is one of the main enemies of beer freshness and flavor stability. Minimize oxygen exposure during filling by keeping your equipment clean and sanitized, purging bottles with CO2 before filling them, and capping them immediately after filling.
-
Label diligently: Don’t forget to label each bottle with essential information like brewing date, beer style, and any additional notes or special ingredients used. This will not only enhance organization but also add a professional touch when sharing your brews with friends or entering competitions.
Now that we’ve covered precision in bottle filling techniques, let’s move on to the next crucial step in the bottling process – capping and sealing techniques – which ensures proper preservation of your homebrewed beer until it reaches its intended consumers’ glasses.
Capping and Sealing Techniques
Section Title: Filling Bottles with Precision
Having discussed the importance of precision in the bottling process, let us now delve into effective techniques for filling bottles accurately. To illustrate these methods, consider a hypothetical scenario where a homebrewer named Alex is preparing to bottle their latest batch of IPA.
Filling bottles with precision requires careful attention to detail and adherence to specific steps. Here are some key techniques that can help ensure accurate and consistent beer filling:
- Maintain cleanliness: Before starting the bottling process, it is crucial to sanitize all equipment thoroughly. Cleanliness helps prevent contamination and ensures the quality and longevity of the beer.
- Use a siphoning tool: A siphoning tool, such as an auto-siphon or racking cane, enables controlled transfer of beer from the fermenter to individual bottles without disturbing sediment at the bottom. This method minimizes oxidation risks while maintaining clarity in the final product.
- Apply appropriate headspace: Headspace refers to the empty space between the top of the liquid and the cap inside each bottle. It is essential to leave enough headspace (typically ½-¾ inch) to accommodate carbonation during secondary fermentation without excessive foaming or risking overcarbonation.
- Employ gravity-filling technique: Gravity-filling involves placing sanitized bottles on an elevated surface higher than the fermenter, allowing beer to flow naturally through tubing into each bottle until desired levels are reached. This method eliminates excess agitation and reduces oxygen exposure.
To further understand these techniques visually, refer to Table 1 below which summarizes key considerations when filling bottles with precision:
Table 1: Key Considerations for Precise Bottle Filling
| Technique | Importance |
|---|---|
| Maintaining Cleanliness | Prevents contamination |
| Using Siphoning Tool | Minimizes oxidation |
| Applying Headspace | Avoids overcarbonation or foaming |
| Employing Gravity-fill | Reduces agitation and oxygen exposure |
By implementing these techniques, Alex can ensure consistent bottle filling results, offering a delightful drinking experience to friends and family who will sample the homebrewed IPA.
With bottles now accurately filled, the next crucial step in the bottling process is capping and sealing. Let us explore effective methods for securing the freshness of your beer in the upcoming section on ‘Capping and Sealing Techniques.’
Storing and Aging Homebrewed Beer
In the previous section, we discussed capping and sealing techniques to ensure the freshness and carbonation of your homebrewed beer. Now, let’s delve into the crucial aspect of storing and aging your beer properly for optimal flavor development.
To illustrate the importance of proper storage, let’s consider a hypothetical scenario: You have just brewed a batch of IPA with complex hop flavors that you are eager to savor. However, if this beer is not stored correctly, those delicate hop aromas could fade quickly, leaving you with a lackluster drinking experience.
To maximize the quality of your homebrewed beer during storage and aging, here are some key tips:
- Temperature control: Maintain a consistent temperature throughout the storage period. Fluctuations in temperature can negatively impact your beer’s flavor and stability. Aim for temperatures between 45°F (7°C) and 55°F (13°C) for most styles.
- Avoid exposure to light: Ultraviolet rays from sunlight or fluorescent lights can cause skunky off-flavors in your beer. Store it in dark areas or use amber-colored bottles to provide protection.
- Minimize oxygen contact: Oxygen is an enemy when it comes to preserving beer quality over time. Make sure all containers are tightly sealed and avoid excessive agitation that can introduce air into the liquid.
- Patience is key: While some beers are best enjoyed fresh, many styles benefit from extended aging periods where flavors mellow and blend together harmoniously.
To help visualize these recommendations further, refer to the table below showcasing different storage conditions and their effects on beer quality:
| Storage Condition | Effect on Beer Quality |
|---|---|
| Consistent temperature | Maintains flavors; prevents oxidation |
| Exposure to light | Causes skunky off-flavors |
| Sealed containers | Preserves freshness and carbonation |
| Extended aging periods | Allows flavors to mellow and blend together |
By following these guidelines, you can ensure that your homebrewed beer reaches its full potential. Remember, proper storage and aging techniques are essential for enjoying the fruits of your brewing labor with maximum satisfaction.
Note: The emotional response evoked by the bullet point list and table may vary depending on the reader’s personal interest in homebrewing or appreciation for craft beer.